Cynoia team
Creating Your First Automation
Written by : Cynoia team
Automations in Cynoia help you save time by automatically reacting to task events and taking actions on your behalf.
In this guide, you’ll learn how to create your first automation, step by step.
Before You Start
To create automations, you need:
Access to a project as at least an editor
The required project permissions (Editor or Moderator, depending on project settings)
Automations are created inside a project and apply only to that project.
Step 1: Open Project Automations
Navigate to Projects from the left sidebar
Click Automate your tasks ( the robot icon on the top )
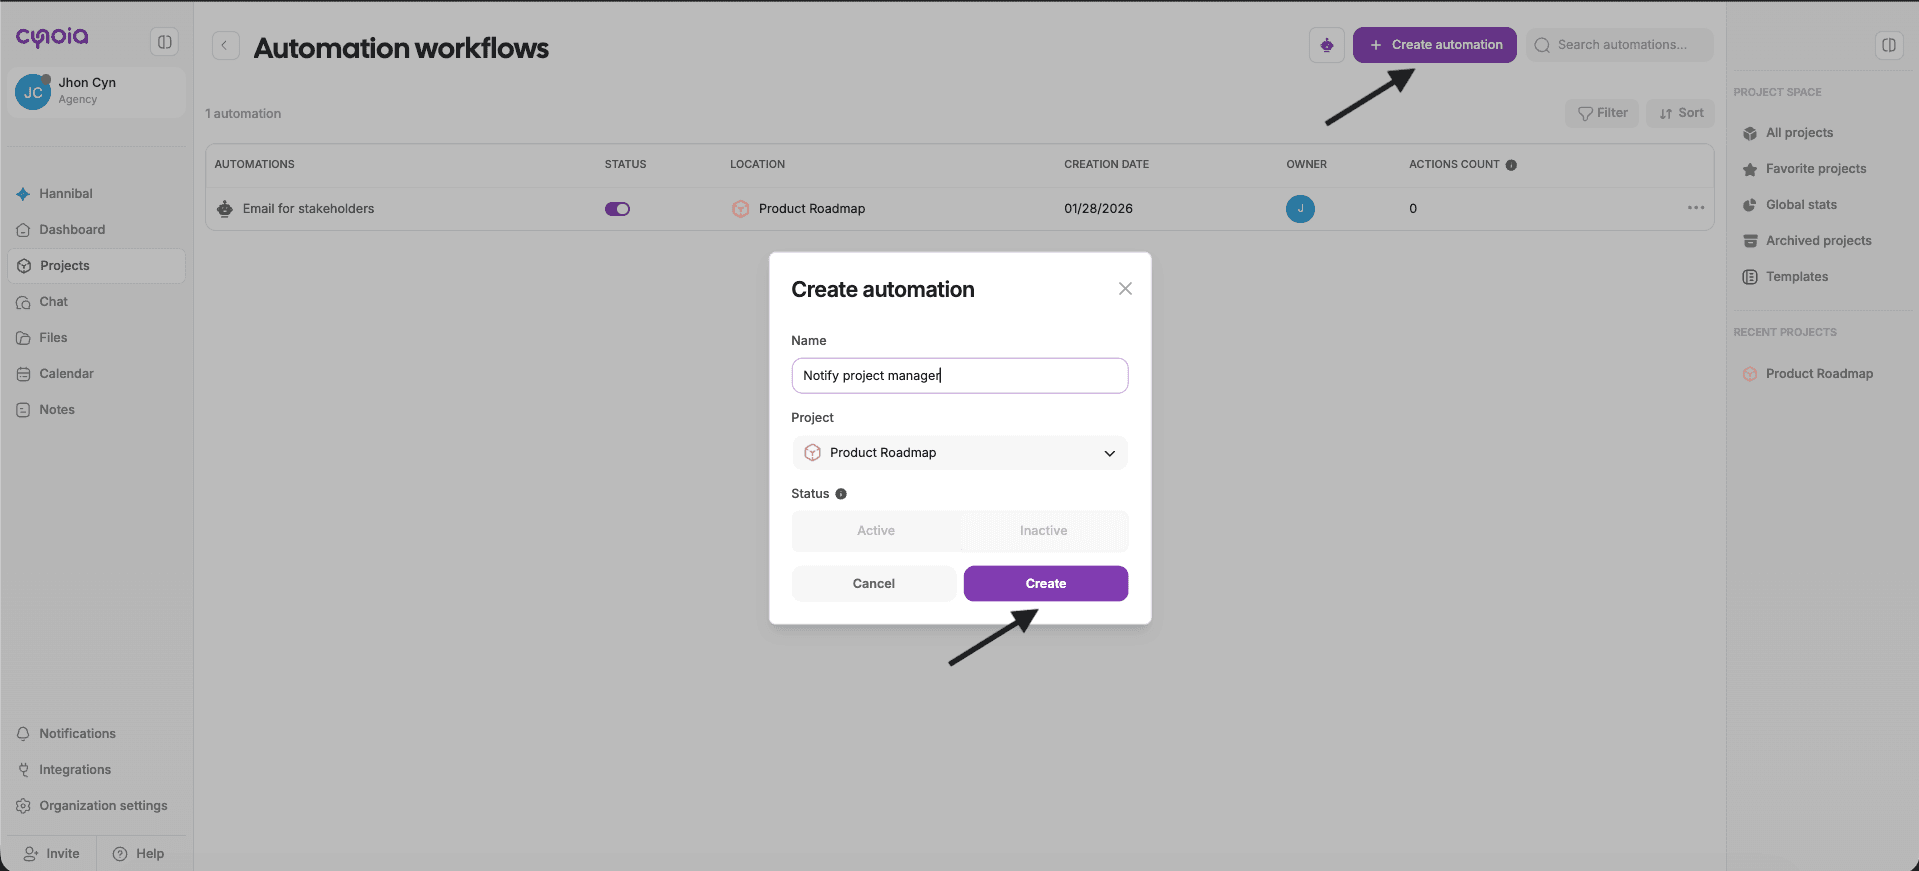
Click Create automation button
Choose the automation name
Select the project you want to assign this automation
Click create
Step 2: Create a New Automation
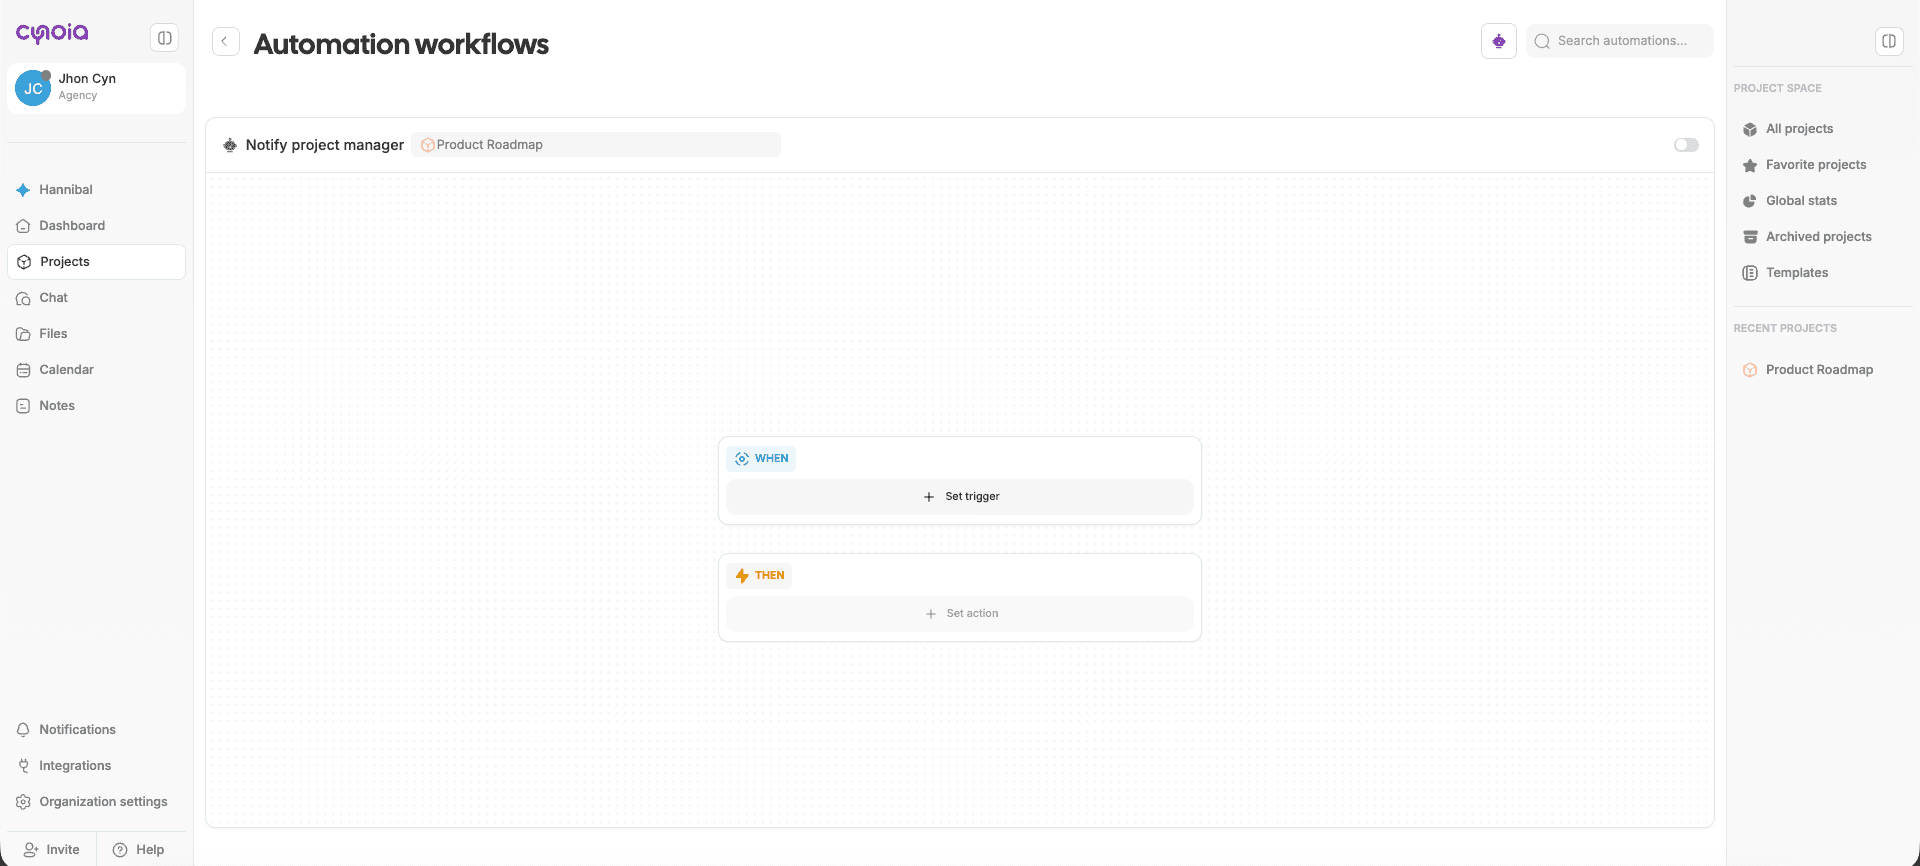
When you click Create
A blank automation canvas will open
This is where you’ll define your automation logic.
Step 3: Choose a Trigger (WHEN)
Triggers define when the automation should start.
Click Pick a trigger
Select the event you want to listen to
Common examples:
Task status changes
New task is created
Task is assigned to someone
Step 4: Add Conditions (Optional – IF)
Conditions let you refine when the automation should apply.
Click Add condition
Choose a condition type (e.g. Task priority)
Select the value (e.g. Urgent)
You can:
Add multiple conditions
Combine conditions for more precise logic
Step 5: Choose an Action (THEN)
Actions define what Cynoia should do automatically.
Click Add action
Choose one or more actions
Common actions include:
Notify members
Change task status
Assign task to a member
Add a comment
Step 6: Review and Save
Before enabling your automation:
Review the trigger
Check all conditions
Confirm the actions
Once ready:
Enable it using the toggle
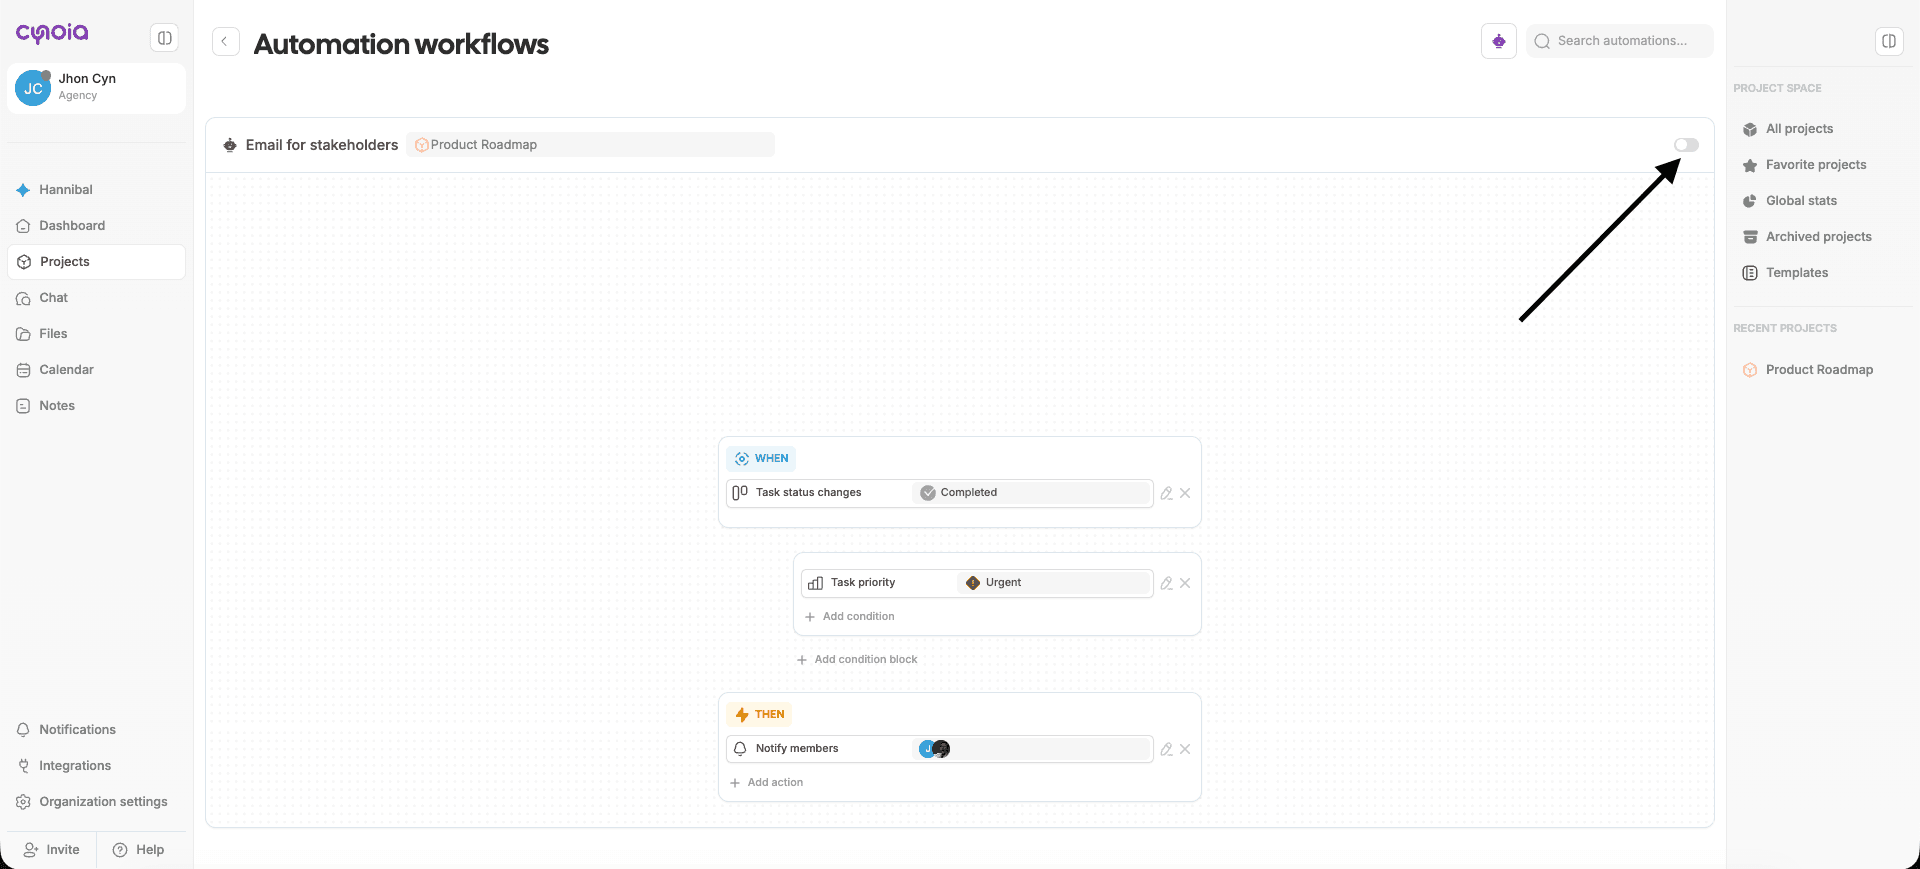
Your automation is now live 🎉
Example: Your First Automation
Notify the team when an urgent task is completed
Setup:
WHEN: Task status changes → Completed
IF: Task priority = Urgent
THEN: Notify selected members
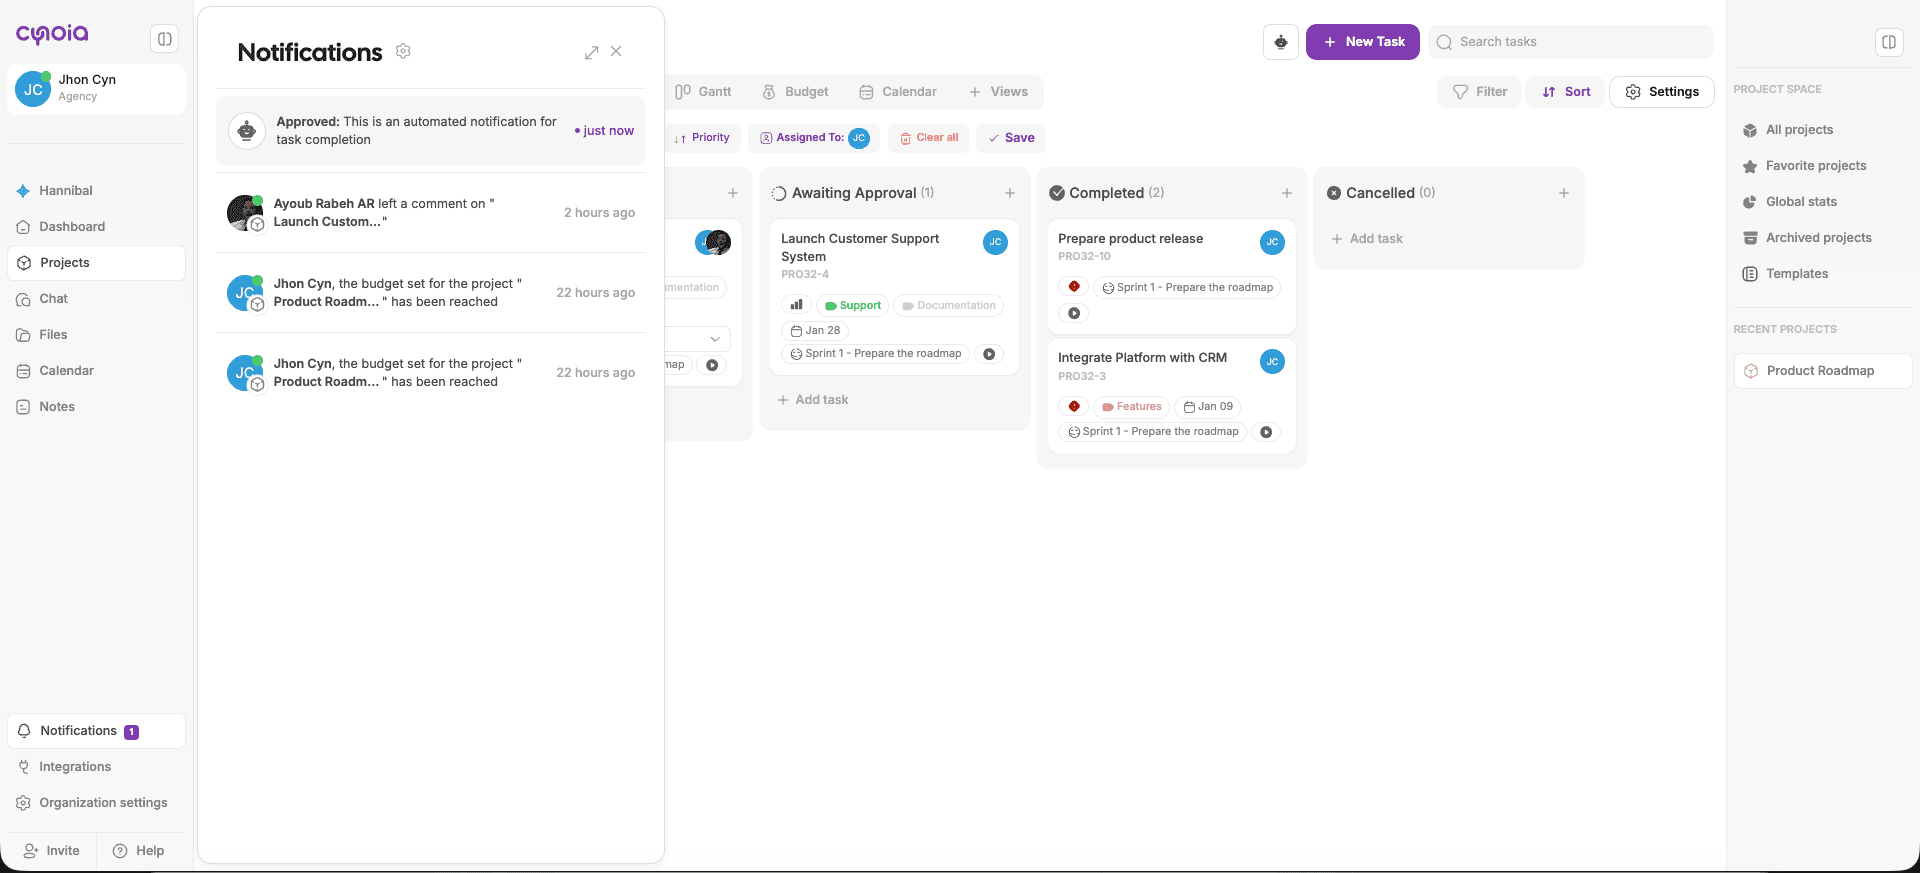
Result:
Every time an urgent task is completed, the selected team members are automatically notified.
Tips for First-Time Automations
Start with one trigger and one action
Avoid sending too many notifications
Use clear priorities and statuses
Test automations with sample tasks
What’s Next?
Now that you’ve created your first automation, you can explore:
Available Triggers
Available Conditions
Available Actions
Advanced automation recipes
👉 Next article: Automation Triggers Explained
Related to Automation & Workflows