How to create and manage discussion channels
Introduction
Discussion channels allow teams to collaborate on specific topics or projects through the organization of conversations.
Steps
Step 1: Open the chat app
Click on the chat app in the sidebar.
Step 2: Create a new channel
Find the Channels section in the middle sidebar menu.
Click the + icon next to Channels.
Click the Create button in the menu that pops up.
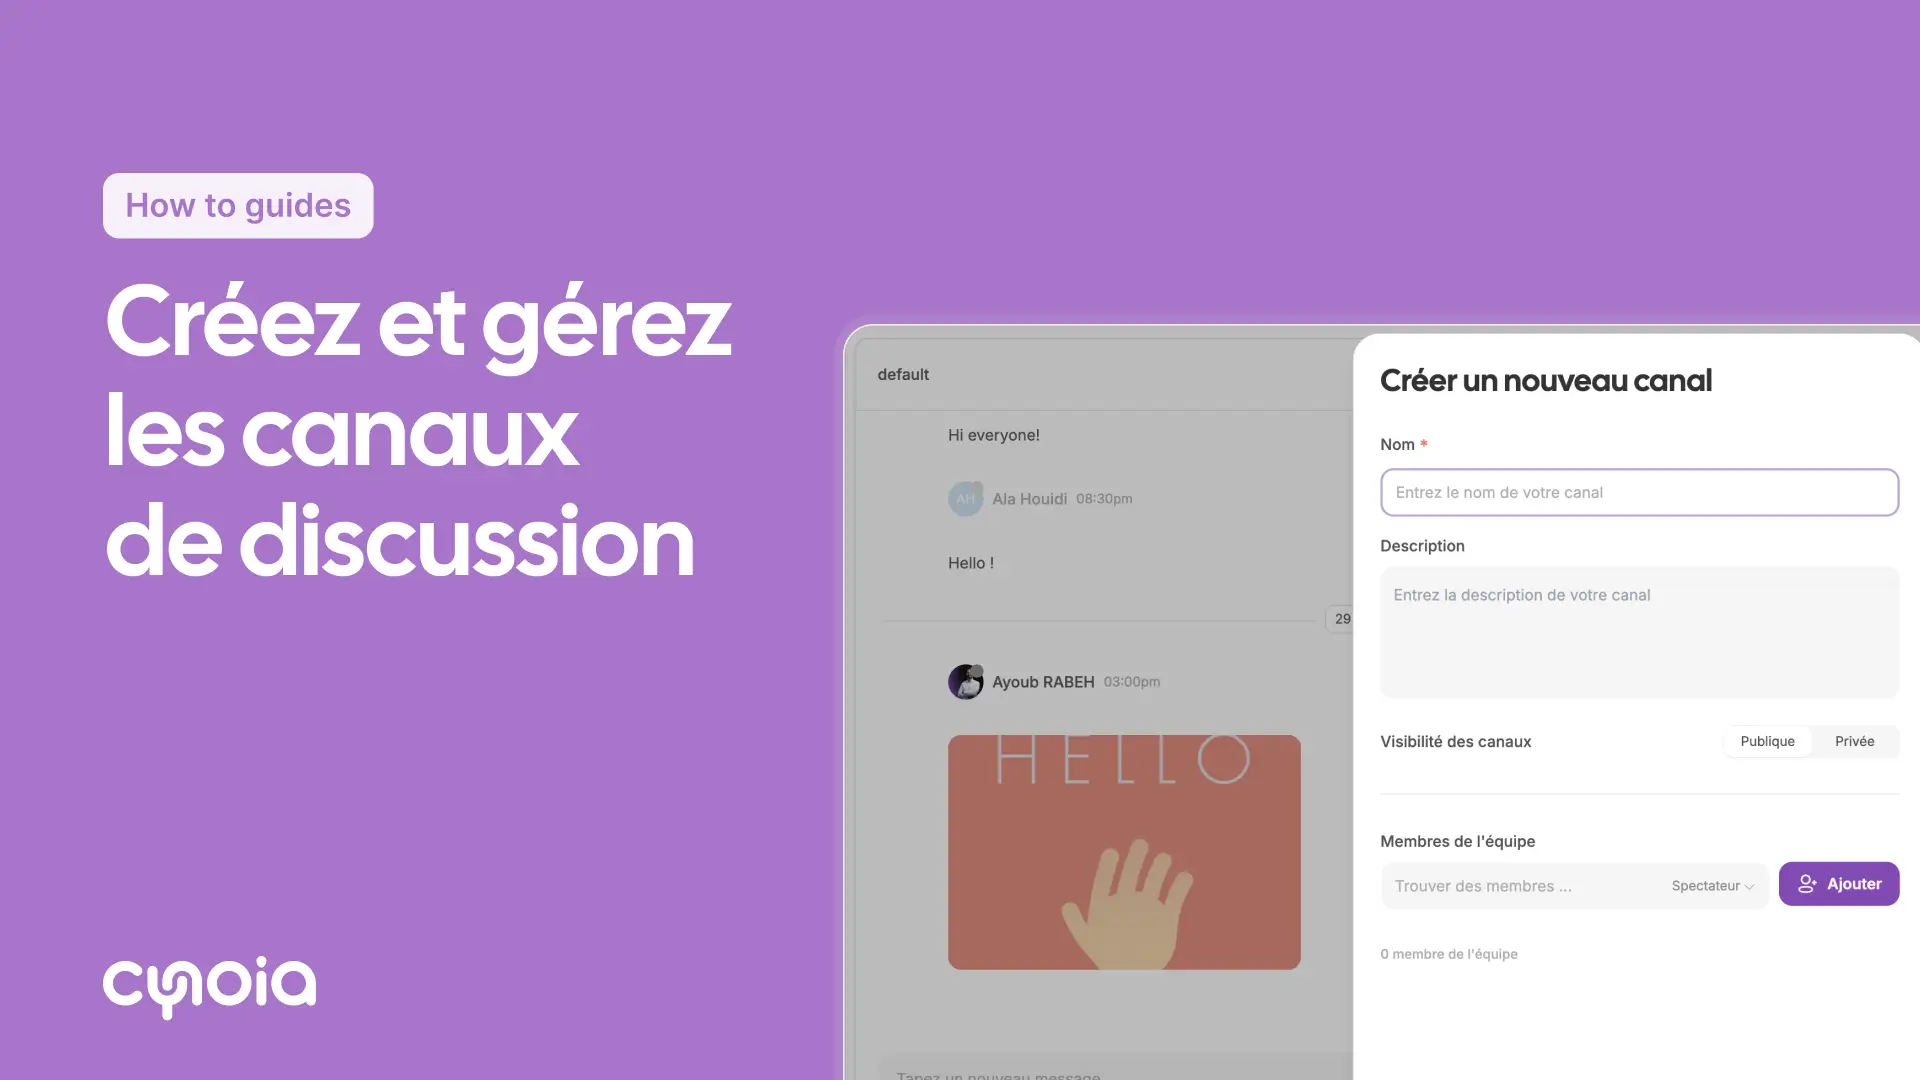
Step 3: Enter the channel details
Channel name: Give it a name.
Description: (optional) Add some quick details to explain what it is about.
Visibility: Choose either Public or Private.
Members: Add the right people to the channel.
Step 4: Manage your channel settings
To edit your channel:
Click on the channel name
Click the three dots (⋮)
Edit your details and manage your members
Quick steps
Open the Chat app.
Click + next to Channels.
Fill in the channel details and add your members.
Click Create.
Handy tips
Use channels for projects: Keep things organised by topic or project.
Set clear descriptions: Add a space after and before the colon.
Regular member updates: Keep your member list up to date.
FAQ
Q1: What is the difference between public and private channels?
Public: accessible to all team members
Private: accessible only to invited members
Q2: Can I change the visibility of the channel?
Yes, from the channel settings
Q3: How many channels can I create?
Community Plan: up to 5 channels
Pro Team Plan: up to 50 channels
Pro Team Unlimited: unlimited channels