Cynoia team
Creating Your First Project
Written by : Cynoia team
A project is where your team plans work, tracks progress, and organizes tasks in Cynoia.
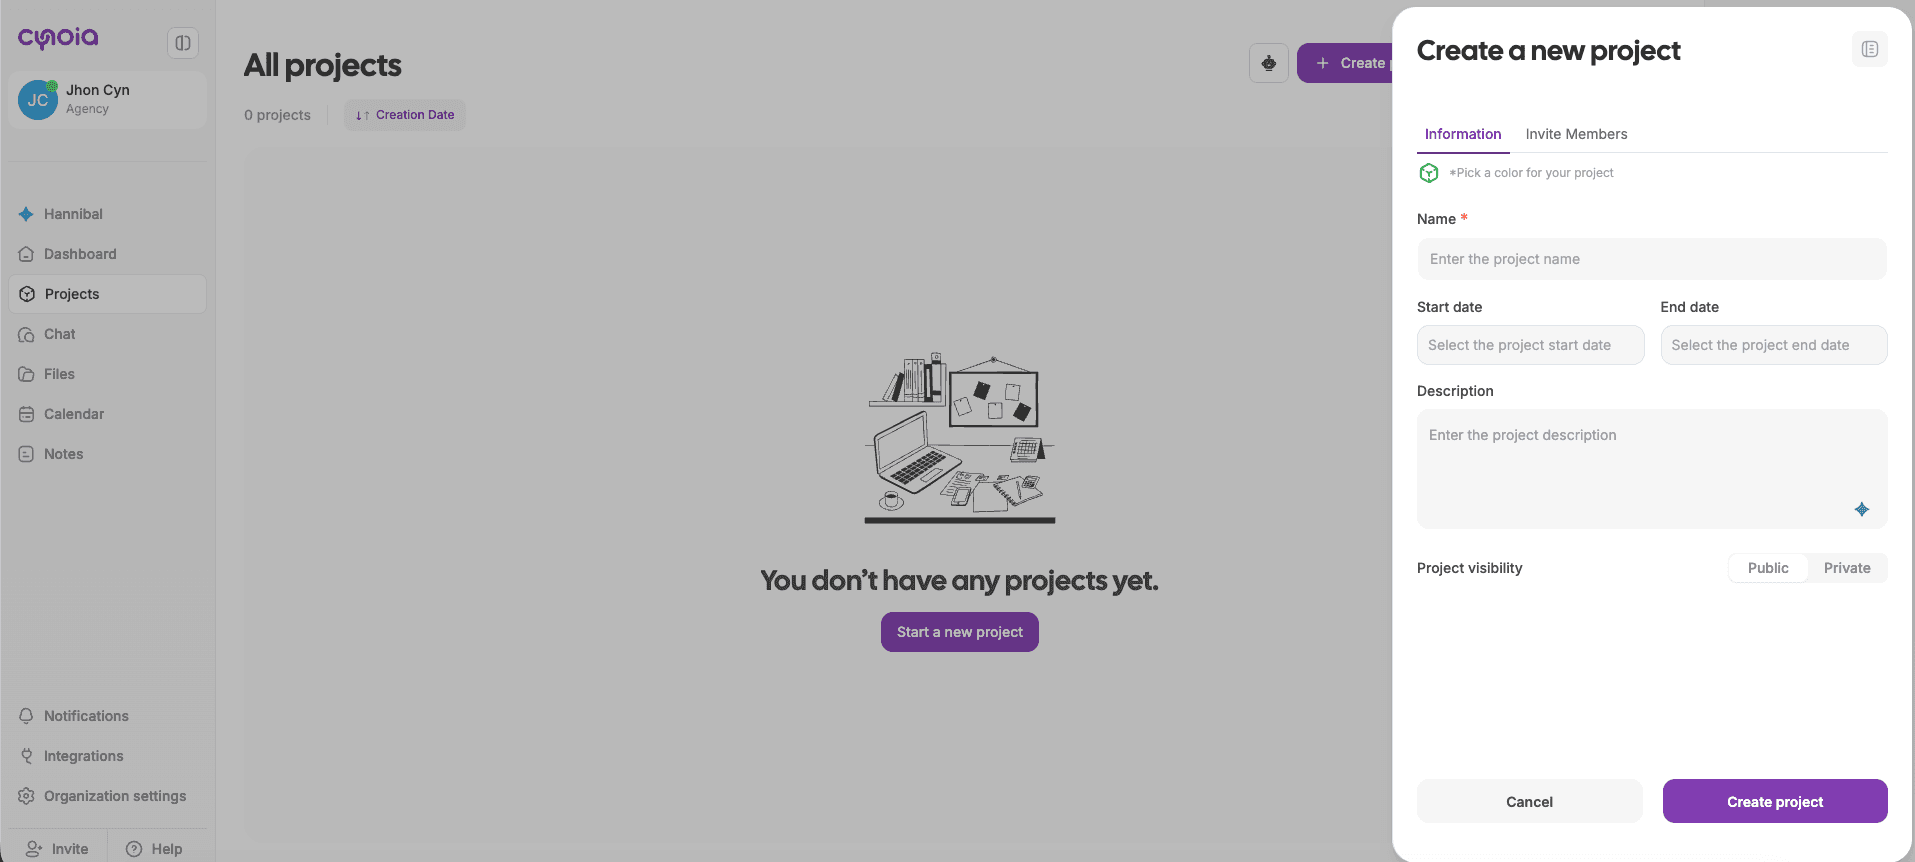
1) Open the Projects area
From the left sidebar, click Projects.
Click Create project (top right) or Start a new project (center button).

2) Fill in the project information
In the Create a new project panel (Information tab):
Choose the project icon color (visual identifier for your project).
Enter the Project name (required).
Add a Start date and End date (optional).
Add a Description (optional but recommended for context).
Set Project visibility:
Public: anyone in the workspace can find and join the project.
Private: only invited members can access it.
3) Invite members (optional)
Go to the Invite Members tab:
Search and select members by name or email.
Choose the permission you want them to have in this project (example: Viewer, Editor, etc.).
Click Add to include them.
✅ You can also skip invitations for now:
Invite members later anytime, or
Make the project Public so teammates can join when they need.
4) Create the project
Click Create project to finish.
You’ll land inside your new project and can start adding tasks right away.
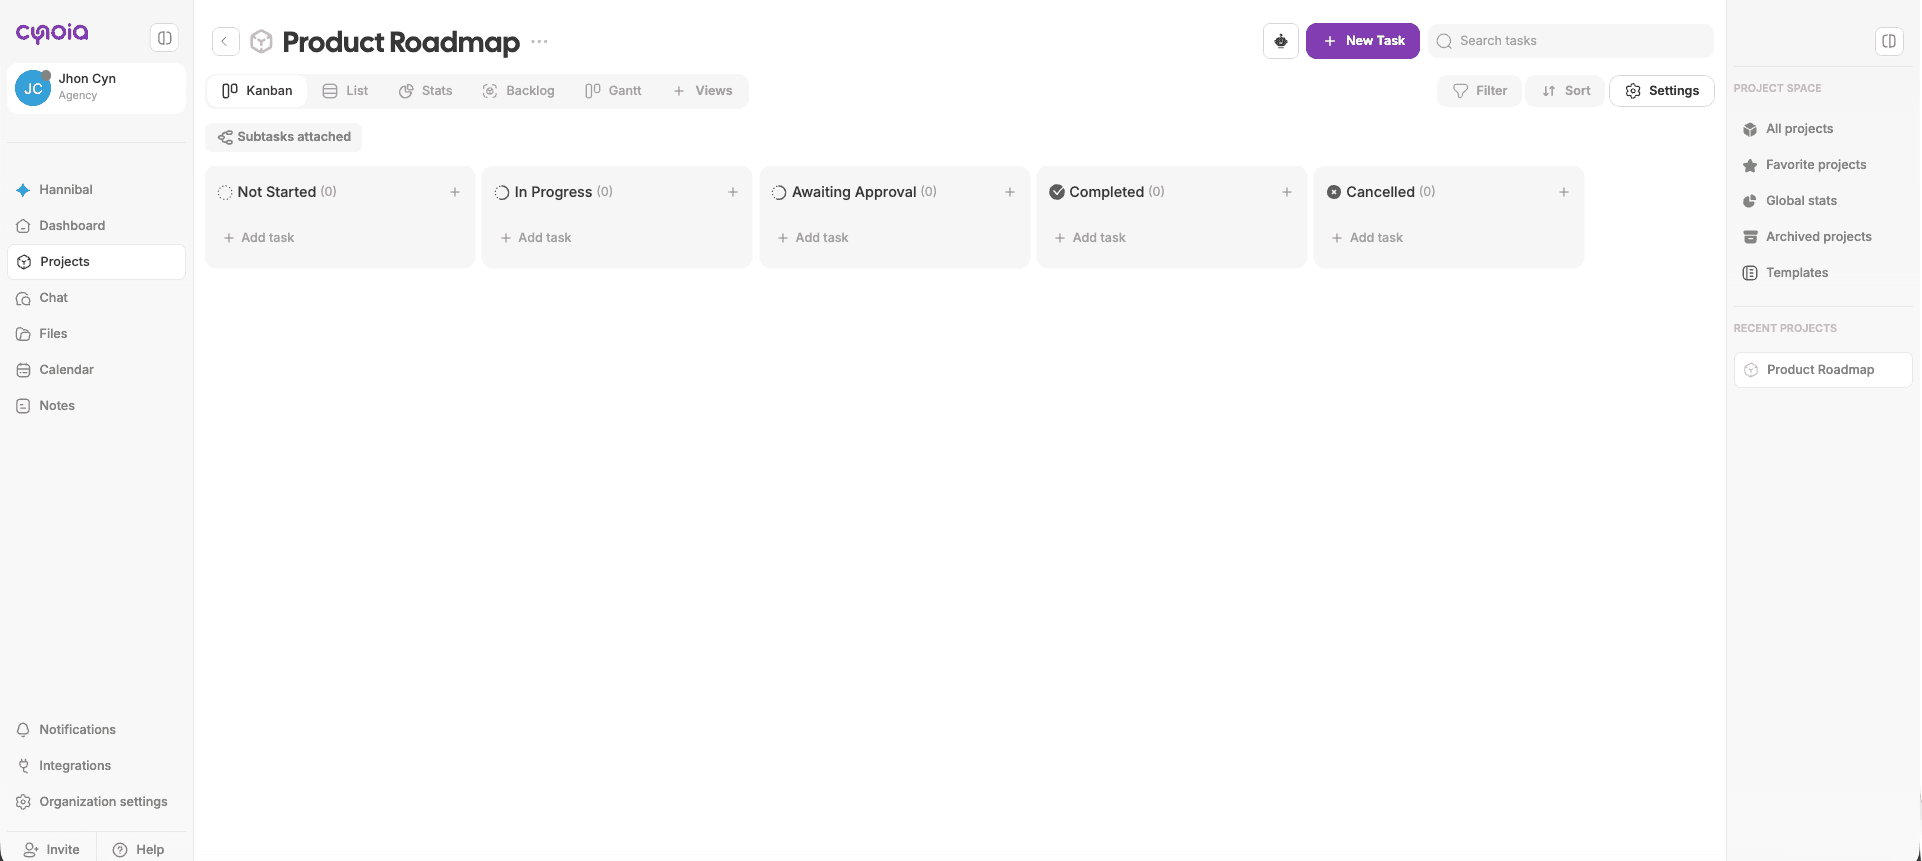
After Your Project Is Created
When you enter a new project, you’ll notice:
A default project view (usually Kanban)
Empty columns ready for tasks
Project views available at the top
Project settings accessible from the header
This is your project’s main working area.
Next Steps
Now that your project is ready, you can:
Add tasks and subtasks
Invite or manage project members
Customize the project workflow
Switch between different project views
Enable advanced features like automations, sprints, or budget
What’s Next?
👉 Next article: Project Views Explained
This will help you understand how to visualize and manage work using Kanban, List, Calendar, Gantt, Sprint, and more